Template tags are invisible, and that's the problem
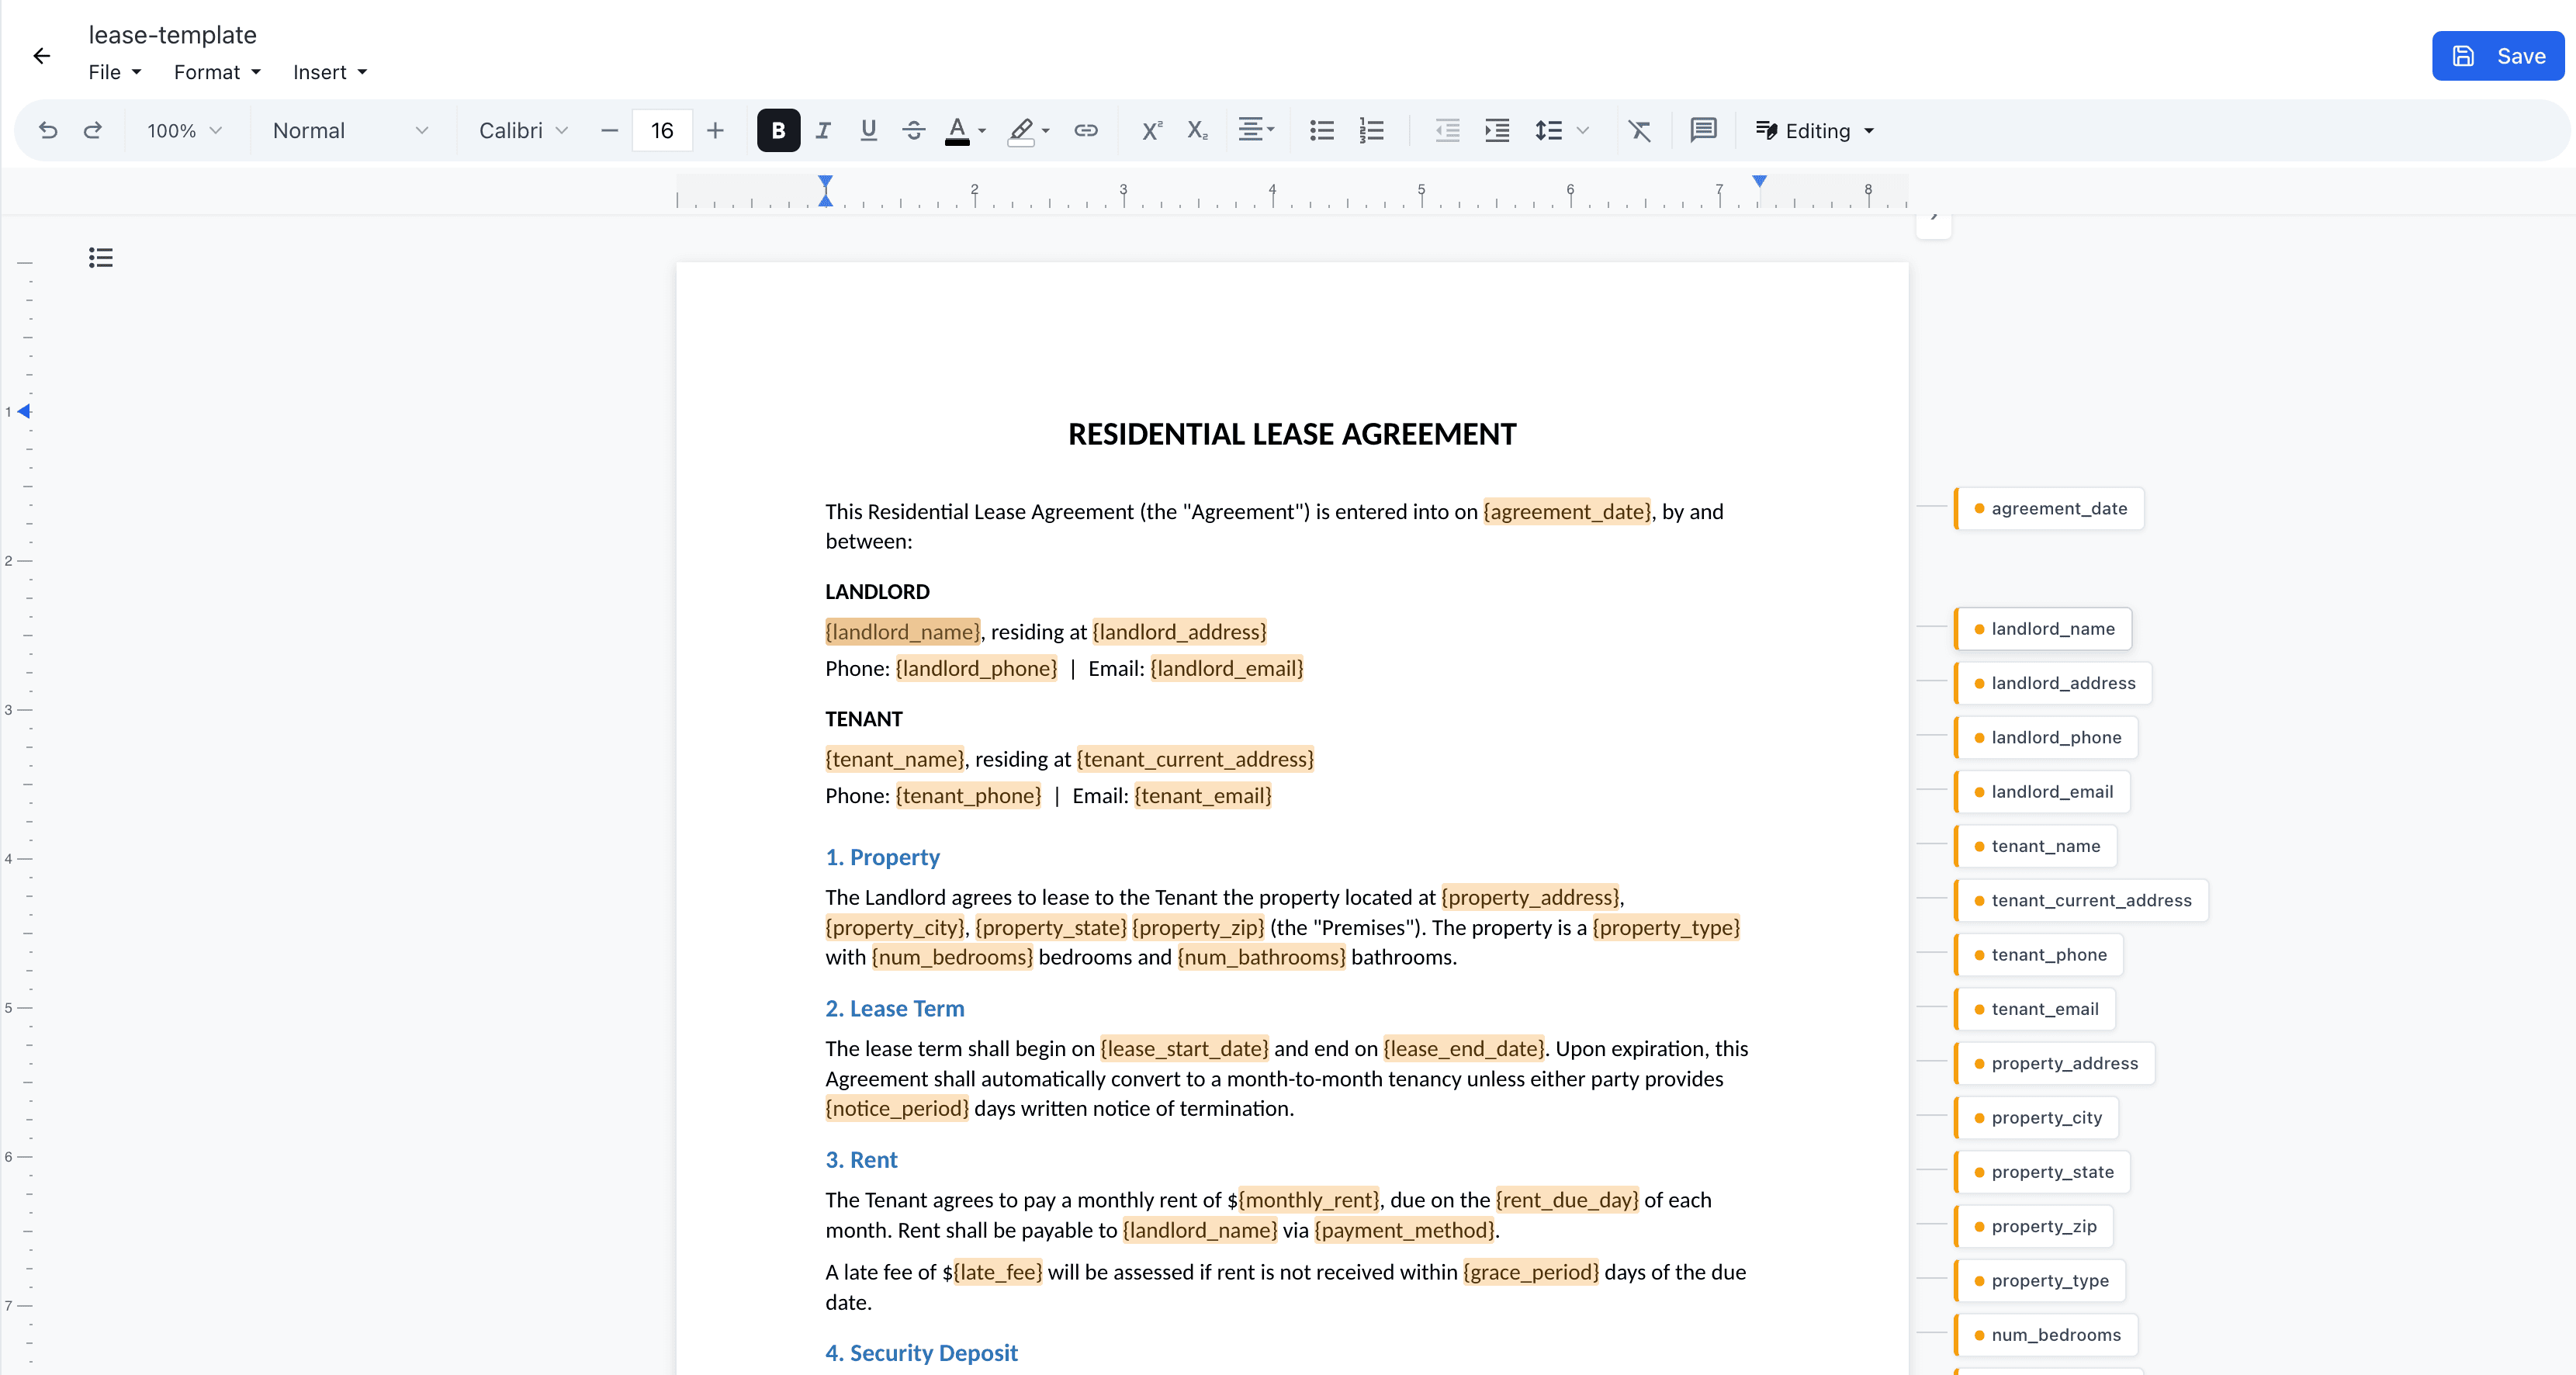
A paralegal opens a 20-page lease agreement in Word. Somewhere in there are {tenant_name}, {lease_start_date}, {monthly_rent}, and maybe 40 other placeholders. They all look like regular text. Nothing distinguishes {landlord_address} from the boilerplate around it.
This is how most docxtemplater workflows look. You author a .docx template, scatter {variables} through it, and hope you didn't miss one or misspell {recipeint_name}. The templating engine doesn't care about typos, it just leaves them in the output.
For a one-page letter, this is fine. For a 30-page commercial lease with nested line items, conditional clauses, and variables in headers and footers, it's a real problem. Paralegals and legal ops teams end up Ctrl+F-ing through documents looking for curly braces, manually cross-referencing variable names against a spreadsheet.
The template plugin solves this by making every tag visible: highlighted inline, color-coded by type, with an annotation panel that shows the full template structure at a glance.
What it does
The plugin adds three things to the editor:
- Inline highlighting so template tags get colored backgrounds in the document text, making
{tenant_name}visually distinct from the words around it - Highlight overlay that renders colored rectangles over tags on the page, with hover and selection states
- Annotation panel on the side listing every tag, anchored to its position in the document
Each tag type gets its own highlight:
| Tag | Type | What it does |
|---|---|---|
{name} | Variable | Replaced with a value |
{#items} | Section start | Starts a loop or conditional |
{/items} | Section end | Closes the loop or conditional |
{^active} | Inverted | Renders when value is falsy |
In a lease agreement, you'd see amber highlights on {tenant_name}, {lease_start_date}, {monthly_rent}, and blue highlights wrapping {#additional_provisions}...{/additional_provisions} where optional clauses get looped in.
Setup
npm install @eigenpal/docx-js-editorimport { DocxEditor, templatePlugin } from "@eigenpal/docx-js-editor";
function TemplatePreview({ buffer }: { buffer: ArrayBuffer }) {
return (
<DocxEditor
documentBuffer={buffer}
plugins={[templatePlugin]}
/>
);
}Upload a DOCX with {variables} in it, and the plugin picks them up automatically. No configuration, no tag registry.
If you want to control the panel:
import { DocxEditor, createTemplatePlugin } from "@eigenpal/docx-js-editor";

const plugin = createTemplatePlugin({
  defaultCollapsed: false,
  panelPosition: "right",
  panelWidth: 280,
});
The panel is resizable (200 to 400px) and collapsible.
How detection works
The plugin scans every text node in the document and picks up all standard docxtemplater syntax:
{variable}for simple variables{nested.property}for dot-notation access (useful for things like{tenant.address.city}){#section}/{/section}for loops or conditionals{^inverted}for inverted conditionals (renders when the value is falsy)
The prefix character determines the tag type. No prefix means it's a plain variable.
Section nesting
The parser tracks a section stack. When it hits {#line_items}, it pushes onto the stack. Any variables found inside, like {description}, {quantity}, {unit_price}, get marked as insideSection and added to the parent's nestedVars array:
if (type === 'sectionStart' || type === 'invertedStart') {
  tag.nestedVars = [];
  sectionStack.push(tag);
} else if (type === 'variable' && sectionStack.length > 0) {
  const section = sectionStack[sectionStack.length - 1];
  section.nestedVars?.push(name);
  tag.insideSection = true;
}
This is how the annotation panel knows to show nested variables under a section chip. The {#line_items} chip shows description, quantity, unit_price as sub-items.
The annotation panel
The panel renders chips anchored to each tag's vertical position in the document. Variables get a colored dot. Structural tags get a typed badge like LOOP / IF or IF NOT. Section chips expand to show their nested variables.
Clicking a chip scrolls the editor to that tag and selects it. Hovering a chip highlights the corresponding tag in the document, and vice versa.
For a paralegal reviewing a template, this means they can scan the panel to see every variable in the document without scrolling through 20 pages. If {guarantor_name} shows up and it shouldn't be there, they spot it in the panel and click to jump to it.
Filling templates
The preview plugin shows you where the tags are. To substitute values, use processTemplate:
import { processTemplate } from "@eigenpal/docx-js-editor";

const filledBuffer = processTemplate(templateBuffer, {
  tenant_name: "Jane Smith",
  lease_start_date: "April 1, 2026",
  monthly_rent: "2,400",
  landlord_name: "Acme Properties LLC",
});
If you need to know what got filled and what didn't:
import { processTemplateDetailed } from "@eigenpal/docx-js-editor";

const result = processTemplateDetailed(templateBuffer, values, {
  nullGetter: "keep",   // "keep" leaves unfilled tags as-is, "empty" removes them
  linebreaks: true,
});

console.log(result.replacedVariables);   // ["tenant_name", "lease_start_date", ...]
console.log(result.unreplacedVariables); // ["guarantor_name"]
Validation
You can check for syntax errors before processing, things like unclosed tags or malformed braces:
import { validateTemplate, getMissingVariables } from "@eigenpal/docx-js-editor";

const validation = validateTemplate(templateBuffer);

if (!validation.valid) {
  console.error(validation.errors);
  // [{ message: "Unclosed tag: provisions", type: "parse" }]
}

const missing = getMissingVariables(validation.tags, {
  tenant_name: "Jane Smith",
  // lease_start_date is missing
});
// ["lease_start_date"]
For legal documents especially, catching an unclosed {#provisions} tag before the document goes out beats catching it after.
Scanning headers, footers, and footnotes
The editor plugin highlights tags in the visible body. If you also need to scan headers, footers, footnotes, and text boxes (common in legal templates where the firm name is in the header or a matter ID is in the footer), use detectVariablesDetailed:
import { detectVariablesDetailed } from "@eigenpal/docx-js-editor";

const result = detectVariablesDetailed(document);

console.log(result.variables);        // ["amount", "client_name", "date", ...]
console.log(result.totalOccurrences); // 15
console.log(result.byLocation);
// {
//   body: ["tenant_name", "lease_start_date", "monthly_rent"],
//   headers: ["firm_name", "matter_id"],
//   footers: ["firm_name"],
//   footnotes: [],
//   endnotes: [],
//   textBoxes: [],
// }
Next steps
- Try the live editor demo with a template document
- Read about building a template system for the full fill-and-generate workflow
- See the React integration guide if you're starting from scratch
- Browse the source on GitHub